How to Clearly Describe Pinwheel Pattern and Printing Requirements to Your Supplier?
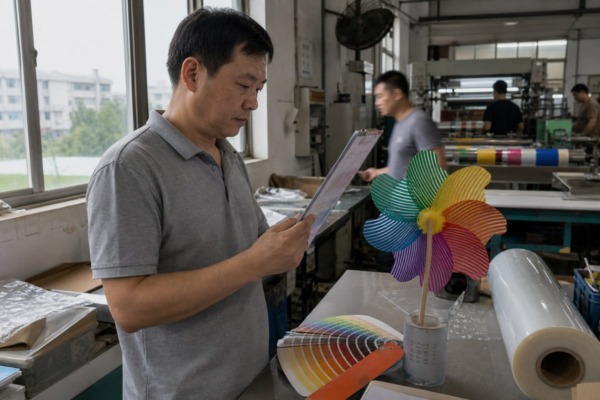
A vague brief for a pinwheel pattern 1 and printing requirements can wreck an order. On our Zhejiang production line, we have reprinted entire batches because one color code was missing.
To describe a pinwheel pattern and printing requirements clearly, send high-resolution vector artwork, state exact Pantone color codes, define print position, front-and-back printing, and registration tolerances, attach a physical reference sample, and approve a strike-off sample before authorizing mass production.
That answer sounds simple. In practice, most briefs miss at least one of those items. I have watched beautiful designs turn into disputes over a single unstated detail. So let me walk you through each part of a production-ready brief, step by step, from the pattern itself to the final sample sign-off.
What Pinwheel Pattern Details Should I Include in My Supplier Brief?
A rush order once stalled on our line for three days because the brief never said how many blades the pinwheel had. That single gap idled our die-cutting station.
Include the pinwheel type and blade count, motif and repeat dimensions in physical units, repeat layout (straight, half-drop, or placement), orientation rules, background color, negative space, and the end-use product, so the supplier can reproduce the design without guessing.
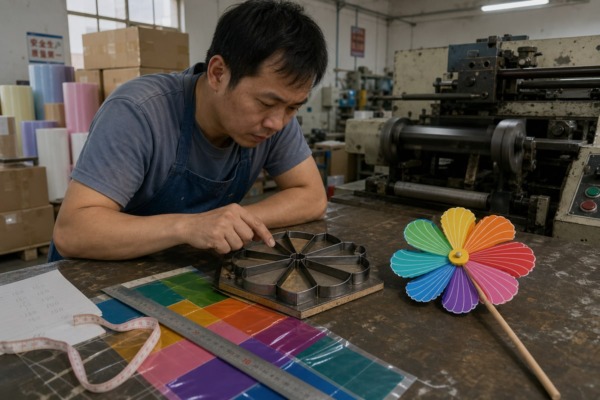
A pinwheel is not one fixed design. In quilting, it is a four-blade block built from triangles. In textiles, it can be a seamless repeat pattern that tiles across yards of fabric. In our world of garden toys, it is a physical spinner with curved petal blades and a printed film surface. Your brief must state which one you mean before anything else. A supplier who assumes the wrong type will quote the wrong process.
Define the Pattern Type and Symmetry
Start with geometry. State the number of blades or segments. Our best-selling garden model uses eight flower-shaped petals with a rainbow gradient and fine white stripes, arranged with even geometric symmetry 2 around a yellow hub. We write all of that into every internal spec. You should do the same. Then say whether the artwork is a single motif, a placement print, a straight repeat, or a half-drop repeat. Each option changes how the factory prepares screens, files, and cutting dies.
State Every Dimension in Physical Units
Pixels tell the factory nothing about final scale. A 2,000-pixel tile could print at 5 cm or at 50 cm. Always give the motif size and the repeat tile size in centimeters or inches. If the pattern crosses seams or panels, request a seam-to-seam alignment strategy, sometimes called an engineered print, so the pinwheel points match at construction joins.
| Detail | What to write | Example |
|---|---|---|
| Pattern type | Motif, quilt block, or seamless repeat pattern | Single eight-blade motif, placement print |
| Blade count and symmetry | Segments and rotational spacing | 8 scalloped petals, evenly spaced |
| Repeat layout | Straight, half-drop, or placement | Half-drop repeat |
| Repeat size | Physical units, not pixels | Tile 15 cm × 15 cm |
| Orientation rule | Which way is up | Stripes radiate outward from hub |
| Distortion limit | Skew and bow tolerance you accept | Maximum 2% skew, stated in writing |
How Can I Specify Printing Methods to Avoid Color and Quality Mismatches?
Every quotation forces a trade-off in our print room: digital inkjet handles rainbow gradients beautifully, while screen printing 3 wins on cost at volume. Your brief should settle that choice.
Name the exact print method—screen, digital inkjet, sublimation, or heat transfer—then lock colors with Pantone or TCX codes, state the CMYK color profile for digital files, define the substrate, and set a written color deviation tolerance before production starts.
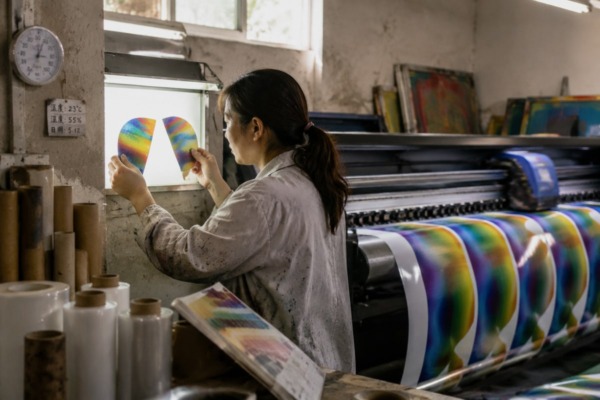
Print method is the biggest single decision in your brief. It controls cost, color range, and hand-feel. It also depends on your material. A thin mylar film behaves nothing like a woven fabric substrate, and ink absorption changes with the material's weight in GSM and its fiber composition. So state the substrate right beside the method. When we quote pinwheel film prints, the substrate line is the first thing our print manager reads.
Compare the Main Printing Methods
| Method | Best for | Watch out for |
|---|---|---|
| Digital inkjet | Complex gradients, small runs, many colors | Slower per unit; needs coated or compatible film |
| Rotary screen printing | High-volume solid colors | Setup cost per color; weaker on gradients |
| Sublimation printing | Vivid all-over color on polyester film or fabric | Works only on polyester-based substrates |
| Heat transfer | Placement prints and small motifs | Edge lifting and stiffer hand-feel over time |
Also state ink chemistry. Water-based inks keep a soft hand-feel. High-density inks create a raised, tactile geometric effect. Both are valid; only you know which fits your product.
Lock Colors in Writing
Name every color using the Pantone Matching System. For textiles, TCX codes are standard. For paper and film, coated PMS codes are safer. If your file is digital-only, state the embedded CMYK color profile 4, because an untagged file can shift during output. Then add a written color deviation tolerance and say under what light you will judge it.
Does Over-Specifying Raise Costs?
Some printers resist rigid briefs. They prefer adapting artwork to their own equipment, and heavy specs can slow quotes. There is truth in that. But vague requests cause worse damage: wrong repeats, drifting colors, flipped orientations. The answer is minimum viable precision. Lock what defines your design—method, colors, substrate, tolerance. Leave secondary choices, like screen mesh or ink brand, open for the factory to optimize, as long as you agree on that freedom in advance.
What Reference Materials Help My Supplier Understand My Design Vision?
One American buyer messaged us on WhatsApp with just a Pinterest photo. We asked five questions before quoting. Her next order arrived with a folder that answered everything upfront.
Send print-ready vector artwork (AI or EPS), a one-page technical specification sheet, Pantone chips or physical swatches, a placement map, product mockups showing scale and orientation, and a physical reference sample; together these remove guesswork and speed up sampling.
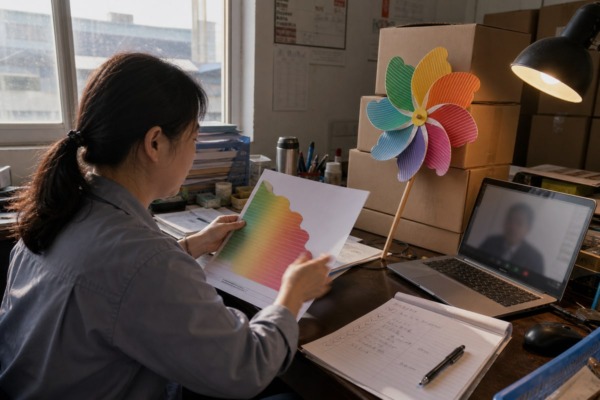
Files alone rarely carry the whole vision. Factories read files literally, not emotionally. The buyers who get the fastest, most accurate samples from us all send a version of the same package. It matches what I recommend to every new client: provide high-definition vector files, write out the color numbers, mark the print position, state front-and-back printing needs, define registration requirements, and attach a real physical sample for reference. Here is that package in order of priority.
- Print-ready artwork in a vector file format, ideally AI or EPS. Vectors scale infinitely, so your pinwheel blades stay crisp at any size.
- Layered source files, so the factory can separate colors cleanly for screens.
- A high-resolution raster file at final size, only if vector is impossible. Low resolution means soft, fuzzy blade edges.
- A one-page technical specification sheet listing dimensions, colors, substrate, and method. One page beats ten emails.
- Pantone chips or approved physical swatches for every color.
- A placement map or product mockup showing where the pattern sits, its orientation, and its scale against the finished item.
- A physical reference sample, even a competitor's product, marked with what you like and dislike.
Cover Both Sides and the Overlaps
Pinwheel blades spin, so customers see both faces. Your brief must state single-sided or front-and-back printing, and whether the reverse mirrors the front. State registration requirements too, since misaligned layers blur the striped petal details. Include bleed and margin settings around each die-cut petal shape so trimming never clips the design.
Show Curves with a Digital Twin
Flat artwork distorts when a petal curls into its 3D spinning shape. A 3D CAD rendering or digital twin shows how the pattern should wrap around the curved blade. For complex custom shapes, we build this preview during co-development, and it prevents ugly surprises at assembly.
How Do I Confirm Printing Accuracy Before Mass Production Begins?
The hardest lesson from our early export years: never let excitement skip the sampling stage. One skipped strike-off cost us a full container of mismatched purple petals.
Request a strike-off sample on the actual substrate, check it against your Pantone references under daylight, verify repeat alignment, edge sharpness, and registration, sign a written approval with tolerances and a remake policy, then release mass production only after that confirmation.
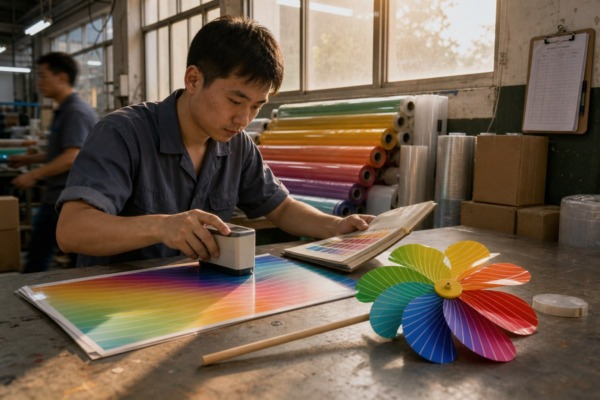
Sampling is not one thing. Different samples answer different questions, and asking for the wrong one wastes weeks. This table shows how we structure it for pinwheel pattern and printing requirements on every OEM order we run.
| Sample type | What it confirms | When to request it |
|---|---|---|
| Lab dip | Color match only, against your Pantone target | Before any artwork is printed |
| Strike-off sample | Pattern, repeat, registration, and color on the real substrate | After artwork approval |
| Pre-production sample | The fully assembled product, blades cut and mounted | Before bulk release |
The Approval Workflow We Recommend
- Approve the artwork layout as a PDF proof first. Catch layout errors while they are free to fix.
- Request the strike-off sample printed on the actual film or fabric, never on substitute stock.
- Judge color in a controlled daylight condition, ideally a D65 lightbox, against your physical Pantone chips.
- Check repeat alignment, seam invisibility, edge sharpness, and layer registration against your written quality control standards.
- Sign and date the approved sample. Keep one counter-sample; the factory keeps a sealed golden sample for line QC.
- Confirm the color deviation tolerance and the remake policy in writing before releasing the deposit for bulk.
That sixth step matters most for buyers who worry about returns and disputes. When tolerances and remake terms are agreed before production, there is nothing left to argue about after. Our team treats the sealed golden sample as the referee: every bulk carton is inspected against it before loading.
Conclusion
Clear pinwheel pattern and printing requirements are not about longer briefs. Make repeat, scale, color, placement, and substrate unmissable, approve the strike-off, and your bulk order will match your vision.
Footnotes
1. Provides historical and technical context for the pinwheel design in textile and pattern history. ↩︎
2. Explains the mathematical and design principles of symmetry used in geometric pattern creation. ↩︎
3. Official site of the leading trade association for the industrial and commercial printing industry. ↩︎
4. Authoritative guide on managing color profiles to ensure consistency between digital files and physical prints. ↩︎
More Articles
You might also find these helpful.

¿Qué certificaciones de resistencia al fuego debo verificar al comprar molinetes?
¿Tienes problemas con especificaciones vagas de patrones de molinetes? Aprende los detalles exactos—número de aspas, colores, dimensiones—que los proveedores necesitan para evitar reimpresiones costosas.
Read More →
¿Cómo verificar la autenticidad de los informes de prueba al comprar turbinas eólicas?
¿Tienes problemas con especificaciones vagas de patrones de molinetes? Aprende los detalles exactos—número de aspas, colores, dimensiones—que los proveedores necesitan para evitar reimpresiones costosas.
Read More →
¿Cómo comprobar si los materiales de los molinetes contienen químicos dañinos?
¿Tienes problemas con especificaciones vagas de patrones de molinetes? Aprende los detalles exactos—número de aspas, colores, dimensiones—que los proveedores necesitan para evitar reimpresiones costosas.
Read More → English
  Spanish
  German
  Arabic